Backyard Baths
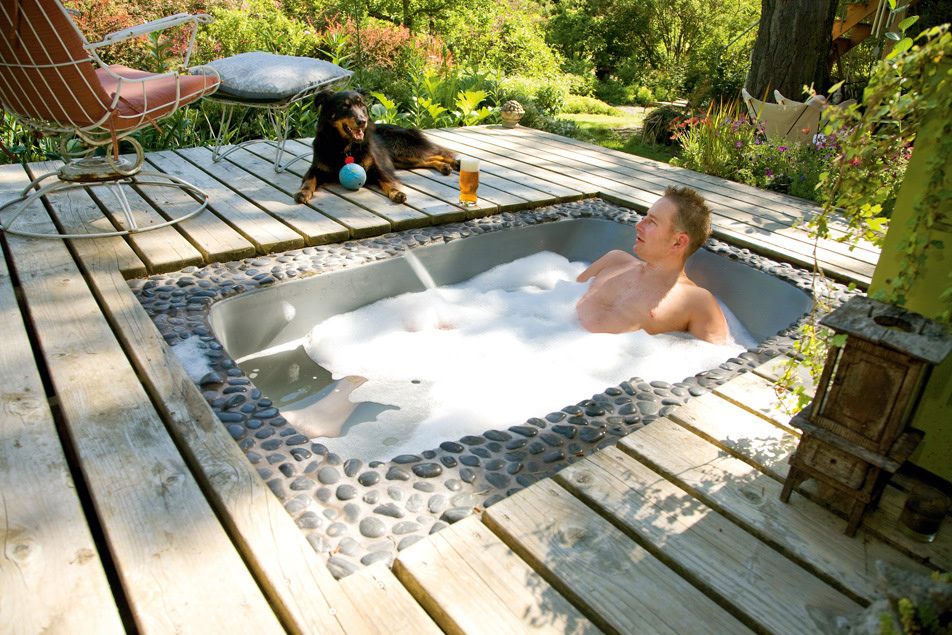
There’s nothing quite like the invigorating bliss of running through the spray of a cold hose on a hot summer’s day. Under the age of 5, it doesn’t matter whose company you’re in—just toss the clothes for the instant refreshment of a nude karate kick through the arc of a backyard sprinkler. For most adults, however, the idea of stripping down au naturel for a backyard frolic might sound too childlike, even potentially illegal. Happily, it isn’t. What’s more, installing an outdoor bathtub can turn the duty of bathing into a stimulating and sensory event.
If fun isn’t enough, consider doing it to save the planet. The average indoor bath consumes 30 to 50 gallons of water—all of which usually finds its way into the treatment plant. By installing a bathtub outside and using a biodegradable soap like Dr. Bronner’s, you can put your bathwater to good use, nourishing your garden and yard plants. And a diluted soapy solution may even be a natural way to ward off aphids. How many indulgences are so clean and green?
{page break}
Location Is Key
Privacy and drainage are the most important factors to consider when choosing a location for your bathtub. Since nudity and bathing tend to go together, it’s important to be conscientious of your surroundings. Use some common sense; your neighbors will appreciate your well-placed cedar fence or landscaping. The objective is to truly relax, and to do so in your birthday suit, you need to know that you and your rubber ducky won’t show up on YouTube in the morning. Choose a spot that also has high elevation to allow for proper drainage away from the bathing area and your house.
Check your site’s grade with a level. If it isn’t flat, adjust it when you build your foundation (see Design the Foundation, next page).
Installing an outdoor bathtub can turn the duty of bathing into a stimulating and sensory event.
Choose a Chariot
The most affordable option is a recycled tub. The ReBuilding Center (3625 N Mississippi Ave, rebuildingcenter.org) and Rejuvenation (1100 SE Grand Ave, rejuvenation.com) have many options, some for as little as $50. Find a fitting balance between budget and style. A clawfoot tub is a good choice since there’s no need to build a frame to hold the tub in place. Plant some French lavender and wisteria nearby, and you’ll be well on your way to reenacting the cover of a Desperate Duchess romance novel.
Too feminine? Try hops and acanthus surrounding a standard tub sunk into a cedar deck. This will definitely say, “Real men take baths.” Or for a stylish splurge, try an ofuro —a Japanese soaking tub handmade of solid wood. With some tasteful landscaping incorporating eucalyptus and white peonies, you’ll feel like you could write your own Memoirs of a Geisha (visit cedartubs.com or rhtubs.com for options).
{page break}
Design the Foundation
A gallon of water weighs about eight pounds. Multiply that by 30 gallons, add the weight of both your tub and a body, and you’re looking at a significant amount of weight. So a solid foundation is key to keeping your tub around for many years.
First, choose the bricks or stone pavers that will create the “floor” of your tub area. Then start digging. You’ll need to dig deep enough for an 8-inch layer of gravel and the depth of your bricks or pavers. For example: if your bricks are 3 inches thick, you’ll need to dig 11 inches total. This will allow your finished surface to be at ground level and will help prevent the bricks from buckling during our occasional winter freezes.
Once you’ve excavated to the appropriate depth, spread some quarter-minus gravel (crushed gravel in ¼-inch or smaller pieces). Use a tamping tool to level and compact the material (the flat side of a section of two-by-four makes a handy implement). Once your surface is flat and at the right height, lay your bricks snugly to create a solid, stable surface. Leaving a space approximately 10 inches square by 6 inches deep will allow for easy access to connect the drainpipe to the tub’s drain assembly (see illustration).
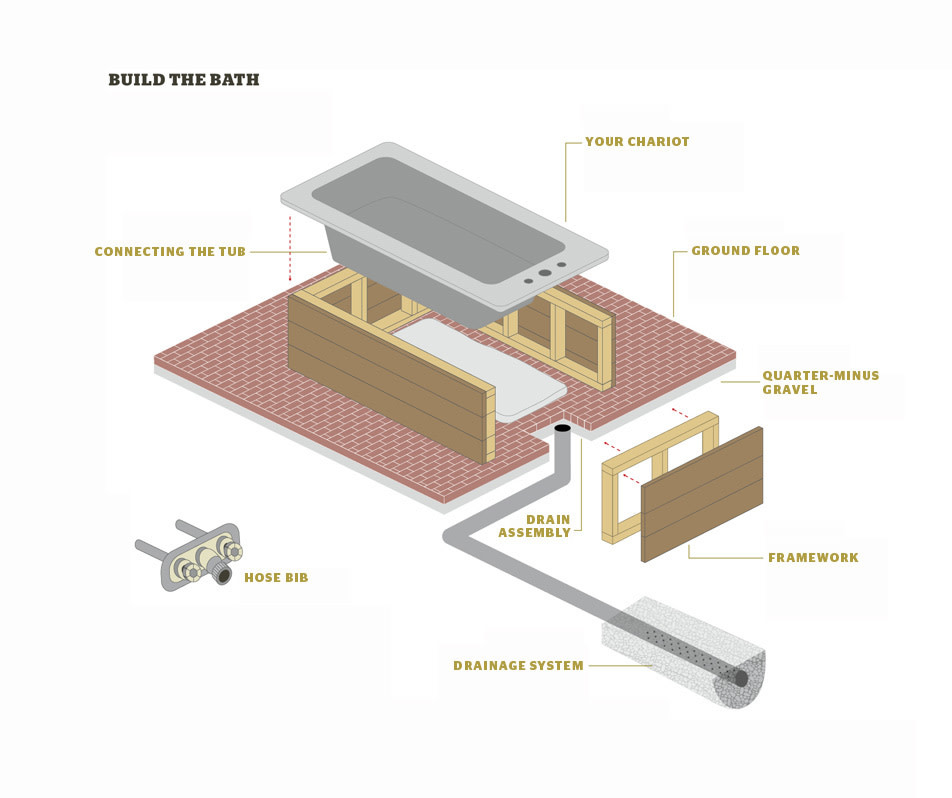
WHERE’S THE WATER? There’s no need to run plumbing to your outdoor tub. A plumber can easily install a simple hose bib that supplies both hot and cold water in place of your home’s existing hose connection.
Note: To safeguard against damaging any underground sewer, water, gas, or electric lines, make sure you call the Oregon Utility Notification Center at 800-332-2344 to have your property’s utilities located. This is required for any excavation in your yard other than general garden tilling.
{page break}
Drainage, a French Lesson
Good fences make good neighbors, and so does good drainage. To make sure you aren’t going to adversely impact anyone else’s land, direct the water away from your house (and your neighbor’s house), toward an area with plants that could use some extra irrigation.
If you have a large garden area with sandy, naturally draining soil, connect the tub drain to your garden with ABS pipe, available at any hardware store. But if the space for your drainage field is more limited, you may want to install a French drain.
To do so, dig a trough 12 inches deep by 12 inches wide, making sure that it is at a lower elevation than your tub to allow gravity to do its thing. Six feet is a good length to shoot for, noting that you can shorten the pipe if your soil naturally drains quickly, or lengthen it if your soil drains slowly. The bottom of the trough should slope in the direction of the water’s flow. Fill the trough three-quarters of the way with gravel (½-inch to 1-inch gravel is appropriate here).
Prepare a 2-inch-diameter ABS pipe (length determined by your trough) by drilling ¼-inch holes along the length of the pipe, which will allow the water to drain. Place the pipe in the trough and cover it with more gravel to finish. This will go a long way toward helping your yard accommodate the bathwater.
Place Your Tub
Once you have a solid, level, drainable platform, a clawfoot tub can be installed by simply setting it in place (with the help of a few friends). But a fiberglass or acrylic drop-in tub insert will need a frame for support.
Each frame will be unique to the tub you choose, but the goal is to build four framing walls that, when attached at the corners, will support the rim of the tub ½ inch above your brick foundation (this ½ inch is for a layer of mortar, which will be explained shortly). Use pressure-treated two-by-fours to build the “walls” of this frame; it’s recommended, though not essential, to use a double header (two planks placed atop one another along the top of the frame), which will be supported by two-by-four studs cut to height and nailed (using galvanized framing nails) every 16 inches on center (see diagram on previous page for frame assembly example).
Once the individual walls are built, nail them together at the corners and do a dry run with your tub to see if it will fit into the frame before continuing. You want to make sure that the rim of the tub fits nicely over the top of the frame, this way it will be supported.
{page break}
If all looks good, cover the outside of the frame with a rot-resistant material. Attaching 1-foot-by-5-foot cedar boards to the two-by-four frame will help to strengthen the structure, but you also could use a sustainable option like FSC-certified Ipe wood. Besides having an elegant appearance, it is very strong, rot-resistant, and harvested from eco-managed forests.
To install the tub, mix some mortar and spread it generously on the brick surface below where the tub will sit. Use enough so that the tub, when set in place, will displace some of the mortar, making a molded nest to help support your tub and deaden sound. Place the tub in the frame and stand in it for a few seconds; then remove it from the frame, make sure you’ve spread the right amount of mortar, and adjust accordingly. Apply some silicone caulk under the tub’s lip and return the tub to the frame for final placement. Let it set overnight.
Once everything is in place, use lengths of ABS pipe with a combination of elbows and couplers to connect the drainage pipe to the tub’s drain assembly.
Fill ’Er Up
To make yours the lowest-maintenance tub in town, no underground plumbing is necessary. Simply have a plumber install a hot/cold hose bib on the side of your house. Then you can run a hose to your tub to provide the warm water; it will be useful for other outdoor tasks like washing your dog or car as well. Attach a shut-off valve to the end of your hose, which will allow you to turn the water on and off as you desire without getting out of your tub.
Once your bathtub is finished, you’ll just need to outfit your space. A string of lights, a hook for a towel, a small shelf for a glass of wine, and maybe even an area for the karate kicks you’ll want to do after a long, rejuvenating soak.