
SOOC vs Image Editing
October 21, 2016
Occasionally I see a post on Facebook or in a birding blog that states emphatically that the image was SOOC (Straight Out Of the Camera). This term generally refers to the absence of post-processing with an image editing program. The image is untouched, just what the photographer saw and the camera recorded. The SOOC camp will not remove items, tweak the exposure or contrast and especially will not use filters or plug-ins to enhance the image. Absolutely no composite photos allowed. Some purists might even draw the line at cropping! There are even SOOC Flickr groups for those "who do not molest the picture".
I agree it is a worthy goal to "get it right in the camera" and good technique with proper settings is critical to making a good image. But it is always puzzling to me since today's digital cameras do a lot of processing as the image is being made. Especially if you are using any of the automated settings or even shooting jpegs instead of RAW. It is a huge debate in the photographer world and I am not here to discuss the merits of the argument. Go ahead and send your shots via WiFi from the camera straight to Facebook or Instagram. I really don't care; everyone is entitled to make images the way they want.
I LIKE post-processing my images and find it almost as much fun as taking them in the first place. You have seen my Photo Art images on the blog which are obviously manipulated, and I almost always tell you when I have done major manipulations to an image. Almost always :-). There are subtle post-processing tweaks I do with the majority of my images that I think improve the quality and appearance of the shot. Thoughtful post-processing can improve a good photo, but nothing can rescue a bad photo. Post-processing will not correct out-of-focus shots.
So let's talk about SOOC vs edited images.
Note: All of the SOOC images are RAW files opened in Camera Raw, saved as .psd and then reduced from 6000 px width to 1000 px width and saved as .jpeg in Photoshop. No adjustments or sharpening. Just so you know.
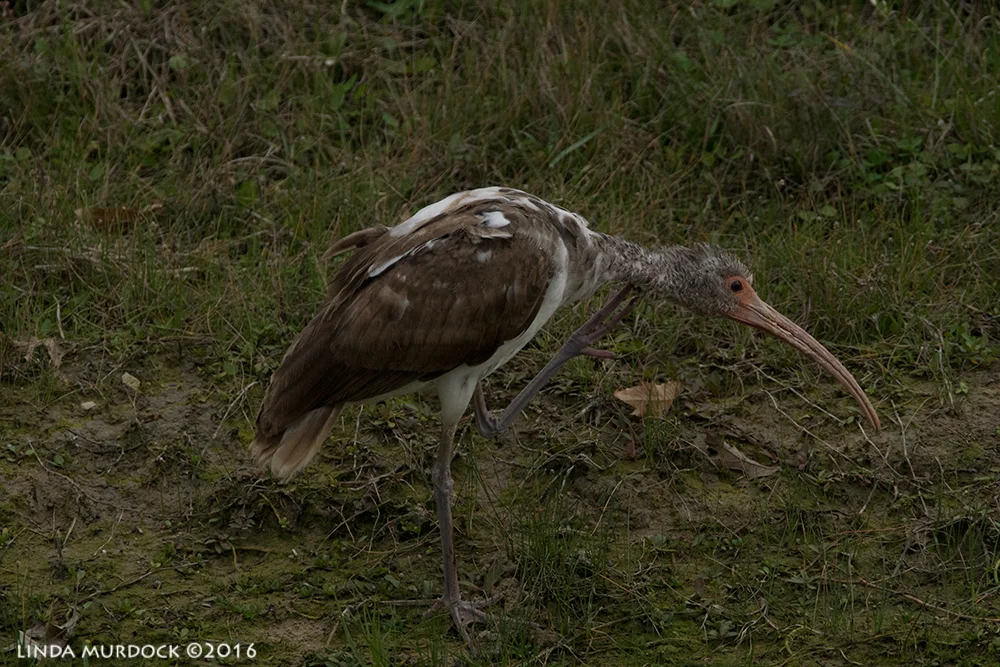
SOOC Juvenile White Ibis - f/6.3 1/2000 sec ISO 1250
This is a juvenile White Ibis I saw at Resoft County Park last winter. We were there shooting the Great Egrets bringing sticks back to the nests and my settings were for white, fast birds against an overcast sky. I noticed the juvenile down below me in a ditch and starting firing off shots. Juvenile White Ibis have very interesting brown-turning-white feathers and look even goofier than the adults. I quickly dropped my shutter speed (because the bird is dark and you need a slower shutter speed to capture more light and he wasn't moving fast anyway) but by then he had stopped scratching and was just standing there looking dorky. So, I was left with some well-exposed boring photos and a few underexposed semi-action shots.
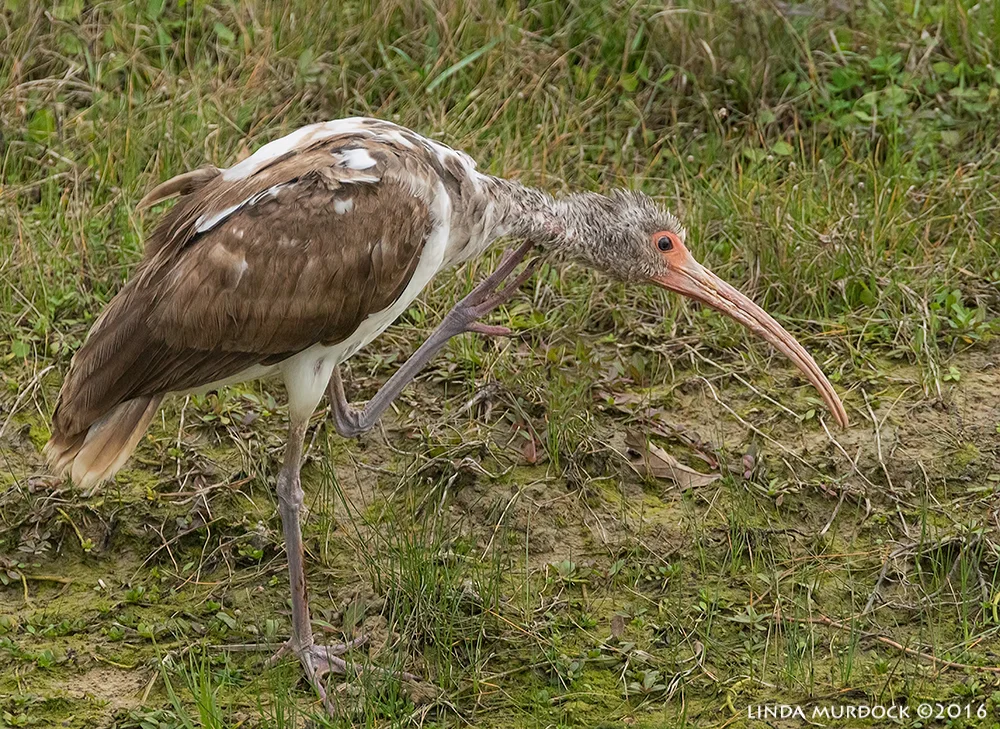
Juvenile White Ibis after post-processing
Looks better, no? It still isn't an award-winning shot, but you can actually see some detail in the feathers now. Here is what I did:

Slider panel in Camera RAW
First, I opened the RAW file in Adobe Camera RAW and made some adjustments. You can increase the Exposure on a photo, but you risk increasing the Noise (which is blotchy ugly smears) in the darker parts, so there are limits. I added a bit of Contrast so it wouldn't look so flat, opened up the Shadows, added a bit of Clarity and Saturation. The sliders are trial and error until you get the hang of it. Just watch what happens when you move them. You can always set them back to zero and start over. The best part about shooting RAW is the tweaks and changes you make are non-destructive. The RAW file is always unchanged.
I always use the Chromatic Aberration reduction and the Lens Profile Correction in Camera RAW. You can find those on this panel under the 6th icon from the left; the camera profile icon.
After that I used Topaz DeNoise (RAW setting - Light). And then I used Photoshop Content Aware to remove the distracting light colored dead leaf in the background, just below his head because my eye kept going to the bright spot instead of looking at the bird. The Content Aware tool is worth the price of Photoshop, IMO. How many times have you had a great photo with a nasty piece of trash in the background? Look at the American Avocet photo at the top of this post. Who thinks it would look better with a crushed (warning: YouTube video) Red Solo Cup in the upper right?
Then the White Ibis image was cropped, reduced to 1000 px width, Smart Sharpened, saved for Web and ready to go. So what do you think?

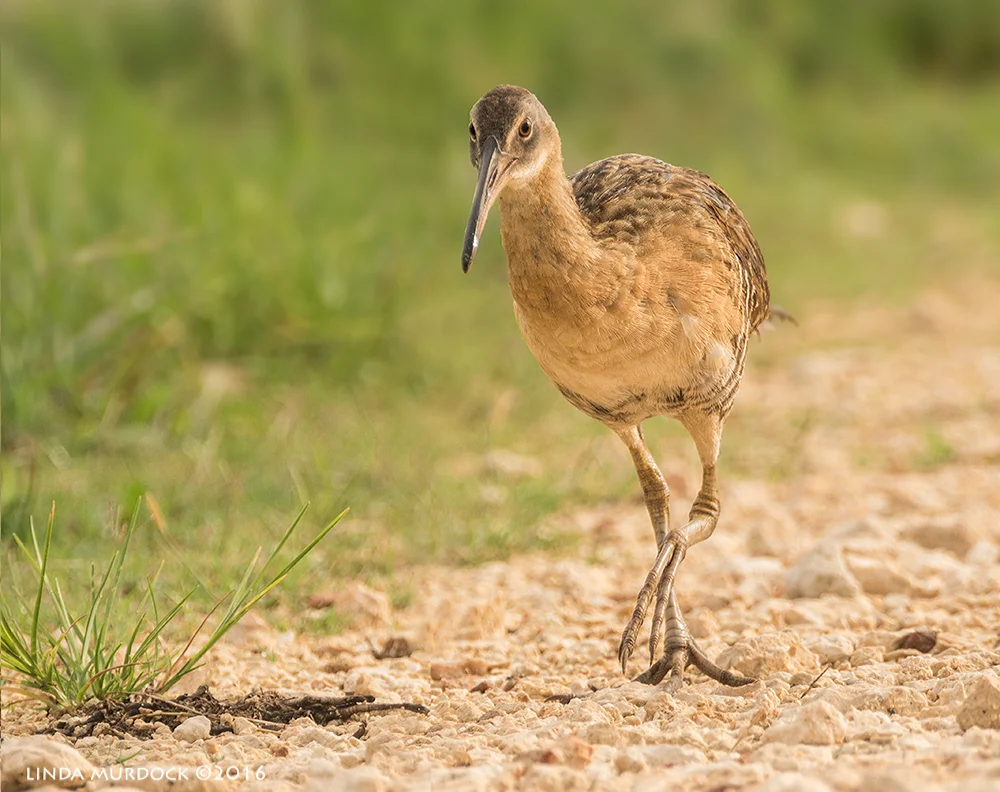
Clapper Rail SOOC f/6.3 1/800 sec ISO 1250
Here is a nice little Clapper Rail walking toward me. Foot and foreground is in focus, head and beak look OK, could be sharper. The entire photo is overexposed, too bright. But, it is much easier to reveal details from a photo that is overexposed than underexposed.
Remember that.
Clapper Rail all cleaned up, post-processed and cropped
The image above was in my archives, I had skipped over it for other more interesting shots. But I did like the sharp, raised foot of this shot. Here is what I did:
Opened in Camera RAW and dropped the Exposure a lot. Added a bit of Clarity and Saturation, dropped the Highlights a bit. Corrected for Chromatic Aberration and applied Lens Correction profile.
Opened in Photoshop and then in NiK Collection Color Effects Pro but I didn't like the Detail Extractor affect. You do know the entire Nik Collection is FREE now, don't you? Click on that link and start downloading! But the aborted filter choice showed the background looked blotchy and unattractive. Back in Photoshop I selected the bird only, inverted the selection and then applied a slight Tilt-shift Blur to only the background to enhance the blurry look. You can find the tools under Filter > Blur.
Started to crop the photo and decided the clump of grass in the foreground would look better a bit closer to the bird. Did a quick Copy/Paste on that edge of the photo and Clone Stamped out the line. Finished the crop, reduced to 1000 px width, Smart Sharpened and saved for the Web.
So... Do the processing and Photoshop changes make the image look fake? or enhanced? Or just right?
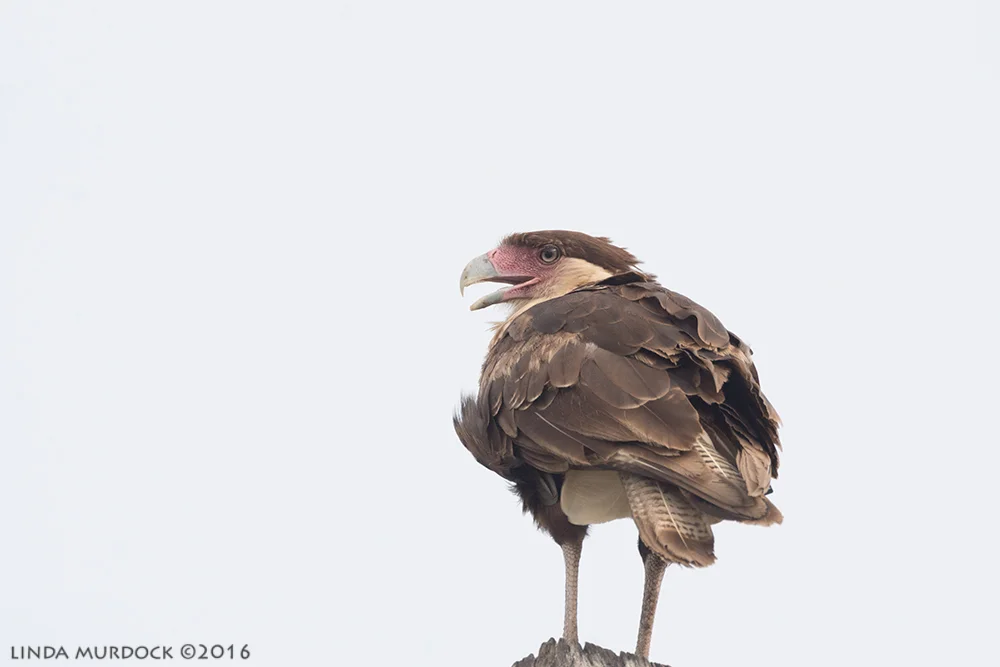
SOOC Crested Caracara f/7.1 1/1250 sec ISO 1250
This is the young Crested Caracara I saw on the last trip to Galveston. I was shooting out of the window of the truck and I needed to raise the (heavy) lens up a bit to get more of the perch at the bottom. Or scrunch down in the seat to shoot even lower. This shot almost cut off his feet, but it was the best one since his mouth was open and calling. I had several more shots where I did raise the lens enough to get more of the pole. But those didn't have the open beak. It is an OK image except he looks like he he is perched in mid-air.
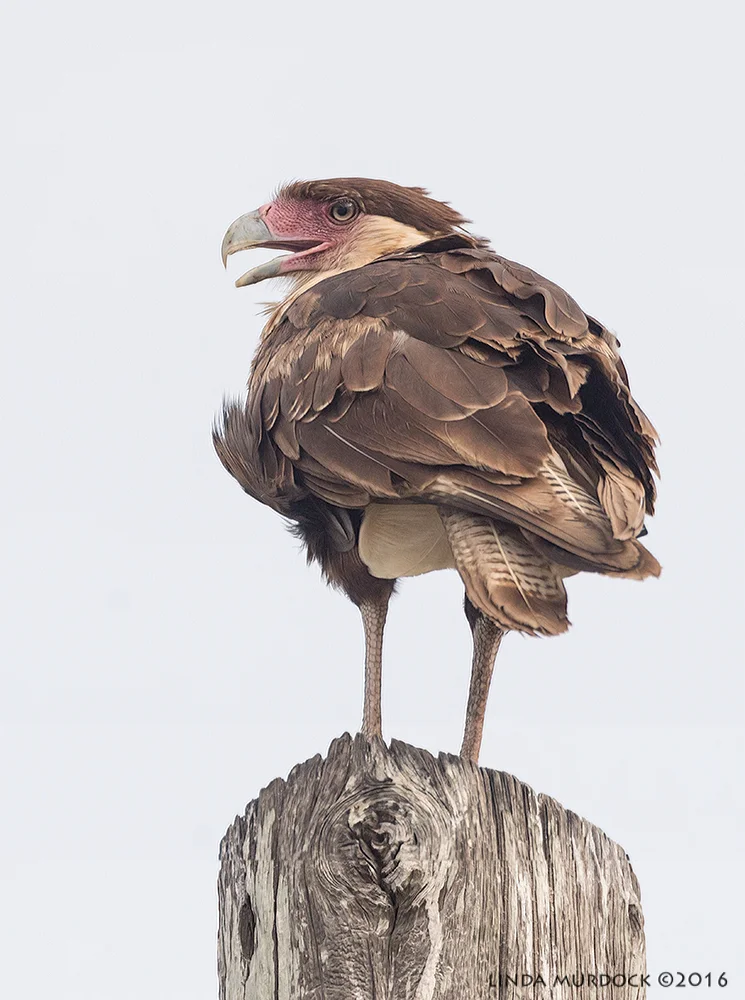
Crested Caracara giving me the eye after post-processing
I took the same image and in Camera RAW corrected for Chromatic Aberration and enabled the Lens Profile I was using. Added a bit of Clarity, dropped the Exposure a tiny bit and opened up the Shadows. It really didn't need much post-processing; it just needed virtual feet! Even if your photo doesn't show the feet, often you need the space where the legs/feet would be to balance the image. Another example would be if the bird is standing in the water. Don't crop just below where his legs go into the water, leave some (virtual) space for the legs and feet.
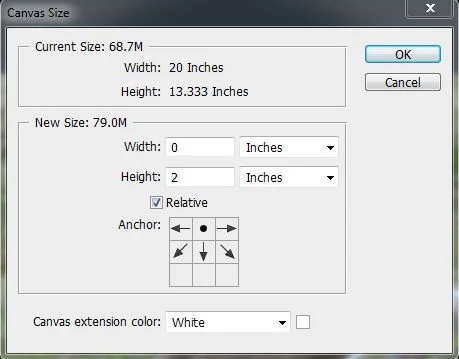
But the image ended right at the tip top of the pole! What to do? In Photoshop I added some canvas to the bottom of the image. Use Image > Canvas size and select the Relative check box. Select the Anchor and add a bit to the top or bottom or side as needed.
I planned to copy part of the pole from a different shot and add it to this one. In the source image (the one I was going to take the copy from) I applied exactly the same changes in Camera RAW I had used on the first image and then copied the bottom. It doesn't matter so much here since I am only going to use the pole, but you want the light direction to be identical when doing a composite. Then, I pasted the copied selection in the added area at the bottom and used the Transform > Skew tool to line it up. When the results are good, flatten the image since you have technically been working in layers.
Then I cropped the image in a vertical format, reduced the image to 1000 px vertical, applied Smart Sharpening and saved for Web. Any time you reduce an image you lose detail so sharpening is useful as a final step. If you try to recover a poorly focused image with Sharpening you will have a worse mess. IMHO.
So... Which one do you like better? The one that has been processed and Photoshopped or the one SOOC? I love making composites and have no reservations about them. After all, I took all of the photos involved. This was done to balance and improve the image; no deception intended. Just look at all the interesting detail in the pole!
All of these changes are fun and only take a short time. Every photo I process gets the Camera RAW treatment - Reduce Chromatic Aberration (that is a purple fringe that might show up between light and dark objects), apply the Lens Profile Correction and then maybe the Shadows opened or highlights dropped. Depends on the image and what it needs. Once in a while it needs nothing!
The other changes take a bit more time, maybe 5 minutes. Of course it took longer when I was learning and Bill used to make me cry because our styles are so different. When I worked, I was a technical writer so I was used to a more formal structure. I would never write "the 6th icon from the left, looks like a little camera in profile" but I just did because that is how he taught me. And when I was learning, I would save a new copy at each intermediate step and take a lot of notes. But with practice and more practice, it gets easier and faster.
Getting it right in the camera where you never need post-processing is a wonderful goal and surely a time saver. But sometimes a perfectly good shot needs a bit of help. Shooting wildlife is not like studio work. You have very little control over the environment (the light can change in an instant) and no control over your subject. And often you only have a split second to take the shot with no repeats or do overs.
Are you a purist and believe in SOOC images? Do you think post-processing takes too much time? Or do you edit your images to make a nice photo really great? Let me know in the comments below:


